Create Your Garden

Peace Lily Leaves Turning Yellow? 15 Causes & Fast Fixes

Peace lily leaves turning yellow? Learn 15 causes and fixes—light, water, soil—to restore glossy growth fast. Simple peace lily care.

Peace lily with yellow leaves, Reasons Your Peace Lily Leaves Turn Yellow

15 Reasons Your Peace Lily Leaves Are Turning Yellow (and How to Fix It)

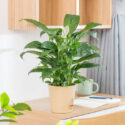
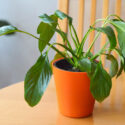
Noticing yellow leaves on your peace lily plant? You’re not alone. A bit of yellowing now and then is normal, but clusters of fading fronds usually mean your plant is telling you something about light, water, roots, or environment. This guide walks you through the most common causes—plus clear, do-this-now fixes you can trust for everyday peace lily care.

Quick Answer — Why Leaves Turn Yellow

Peace lily plant with white spathes

Yellowing most often traces back to watering mistakes (too wet or too dry), low light, mineral buildup from hard water/fertilizer, temperature swings/drafts, low humidity, rootbound stress, or recent moves/repotting. Start by checking soil moisture and drainage, then adjust light, temperature, and water quality. Remove old, yellowed leaves at the base so the plant can focus on new growth.

  • Fast triage: Feel the top inch of soil, lift the pot to gauge weight, peek for drainage holes, and note nearby vents/windows.
  • Best baseline: Bright, indirect light + evenly moist, well-draining mix + 65–80°F (18–27°C) + moderate humidity + periodic flushes with filtered water.

Peace Lily (Spathiphyllum): Quick Facts That Matter for Yellowing

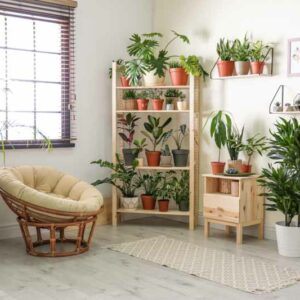
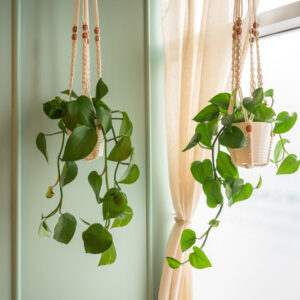
The peace lily plant is a rainforest understory species—shaded, humid, and evenly moist. Indoors, that translates to bright indirect light, a breathable potting mix, steady temperatures, and careful watering. Understanding that natural rhythm makes diagnosing yellow leaves much easier.

Light Bright, indirect; tolerates low light (fewer blooms). Avoid hot direct sun.
Watering When the top inch is dry; drain fully; never let the pot sit in water.
Water Quality Filtered/soft preferred; hard/fluoridated water often causes brown tips and can contribute to yellowing over time.
Soil Well-draining houseplant mix with perlite/bark to keep roots aerated.
Temperature Ideal 65–80°F (18–27°C); avoid cold drafts (<60°F/15°C) and hot HVAC blasts.
Humidity Prefers moderate–high humidity; very dry air raises risk of brown tips and stress yellowing.

The 15 Most Common Reasons for Yellow Leaves (with Fixes)

1 Natural Leaf Aging

Older, lower leaves eventually yellow and die off. If the yellowing is limited to the oldest leaves at the base—and new growth looks glossy and green—this is normal.

  • Spot it: One or two bottom leaves yellowing at a time; rest of the plant looks happy.
  • Fix it: Trim at the base with clean shears. Continue consistent peace lily care; no major change needed.

2 Overwatering (Soggy Soil)

Constantly wet soil starves roots of oxygen, leading to pale, limp leaves that yellow from the base up.

3 Root Rot

Prolonged wetness invites rot. Once roots are compromised, the plant can’t move water or nutrients properly, triggering yellowing and wilting.

  • Spot it: Plant wilts even in wet soil; brown, mushy roots; sour odor. See root rot guide.
  • Fix it: Unpot, trim soft roots, repot in fresh, airy mix, and water lightly until new growth appears.

4 Underwatering (Missed Drinks)

When soil stays dry for too long, leaves droop, lose luster, and can yellow from stress.

5 Poor Drainage or Compacted Mix

Even if you water correctly, a dense mix or a pot without holes traps moisture around roots and mimics overwatering.

  • Spot it: Water pools on the surface; slow drainage; potting mix looks muddy.
  • Fix it: Repot into a well-draining blend: 2 parts houseplant mix + 1 part fine bark + 1 part perlite/pumice. Use a pot with drainage.

6 Low Light (Deep Shade)

In very dim spots, the plant can’t photosynthesize enough, so older leaves are shed first—often yellowing along the way.

  • Spot it: Stretched petioles, few blooms, dull foliage, slow growth.
  • Fix it: Move closer to bright, indirect light. A sheer-curtained window is ideal. (For context, compare with pothos that tolerates deeper shade.)

7 Direct Sun Scorch

Hot sun bleaches chlorophyll and scorches tissue, turning leaves yellow with tan patches.

  • Spot it: Yellowing on sun-facing sides; crispy patches; leaf feels thin and papery.
  • Fix it: Shift out of direct sun or filter with a sheer curtain. Rotate the pot every week for even exposure.

8 Temperature Stress & Drafts

Cold snaps, open windows, exterior doors, or hot HVAC blasts can shock foliage and disrupt uptake, leading to yellowing and browning.

  • Spot it: Sudden yellowing after a move; leaves nearest a door/vent affected first.
  • Fix it: Keep at 65–80°F (18–27°C), away from drafts and heaters; stabilize conditions.

9 Low Humidity

Very dry indoor air dehydrates leaf edges and can push older foliage toward stress yellowing.

  • Spot it: Brown tips/edges with a general dulling; worse in heated or air-conditioned rooms.
  • Fix it: Use a pebble tray or room humidifier; group plants; avoid strong airflow on leaves.

10 Rootbound Pot (Tight Roots)

When roots circle the pot, soil volume shrinks and dries fast—plants droop repeatedly, and older leaves may yellow from stress.

  • Spot it: Roots peeking from drainage holes; water runs through quickly; frequent wilting.
  • Fix it: Repot 1–2 inches wider into fresh, airy mix; water thoroughly and resume normal care.

11 Transplant/Location Shock

After repotting or moving rooms, changes in light, humidity, and watering patterns can stress leaves into temporary yellowing.

  • Spot it: Yellowing appears within 1–3 weeks of a move/repot; new growth eventually looks normal.
  • Fix it: Stabilize light and watering; avoid fertilizing for 2–3 weeks; prune the worst leaves and wait for fresh growth.

12 Water Quality (Hard Water, Fluoride, Chlorine)

Minerals and additives can accumulate, interfering with nutrient uptake and causing yellowing with brown tips.

  • Spot it: Yellowing plus tip burn; white crust on soil; better growth when it rains.
  • Fix it: Switch to filtered, distilled, or rainwater. Every 2–3 months, flush the pot thoroughly to leach salts.

13 Fertilizer Problems (Too Much or Too Little)

Overfeeding burns roots and leads to patchy yellowing; too little feeding in active months can cause a softer, uniform pale.

  • Spot it: Too much: Salt crust, brown tips, stalled growth. Too little: Pale overall color and slower growth in spring/summer.
  • Fix it: Feed lightly every 4–6 weeks in spring/summer at half strength; skip fall/winter. If you overdid it, flush the pot with plain water.

14 Nutrient Lockout (pH & Micronutrients)

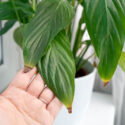
Even with fertilizer, a tight or alkaline mix can block iron/magnesium uptake, causing interveinal chlorosis (yellow leaf with green veins).

  • Spot it: Newer leaves yellow between veins; veins stay greener.
  • Fix it: Repot into fresh, slightly acidic mix; use a balanced, urea-free feed; water thoroughly so nutrients reach roots.

15 Pests or Disease

Sap-suckers steal nutrients and spread stress; leaf spots or blights can yellow tissue around lesions.

  • Spot it: Sticky residue or cottony tufts = scale/mealybugs (see mealybugs, scale); dotted yellow speckling can mean spider mites; irregular spots may be fungal/bacterial.
  • Fix it: Wipe with alcohol-dipped swabs; treat undersides/stems with insecticidal soap or neem oil weekly until clear. Remove infected leaves, improve air flow, avoid overhead watering.

Yellowing Diagnosis Table — Quick Compare

Pattern You See Likely Cause What to Do
Oldest bottom leaves yellow one by one Normal aging Trim at base; maintain routine
General yellowing, soil stays wet Overwatering / poor drainage Dry the top inch; improve mix & drainage
Yellowing with droop, soil bone-dry Underwatering Deep water; set a weekly check-in
Yellow with brown, crispy sun-side patches Sun scorch Move to bright, indirect light
Nearest leaves to a vent/door yellow, then brown Temperature stress / drafts Stabilize 65–80°F; relocate away from vents
Brown tips/edges + dulling foliage Low humidity Pebble tray / humidifier; reduce airflow on leaves
Quick dry-downs, roots circling pot Rootbound stress Repot 1–2 in wider; refresh mix
Yellowing within weeks of move/repot Transplant/location shock Stabilize light/water; pause feeding 2–3 weeks
Interveinal yellowing (green veins) Iron/Mg issue or pH lockout Refresh mix; balanced feeding
Sticky residue / cottony tufts Scale/mealybugs Alcohol swab; soap/neem weekly


Peace Lily, Peace Lily Care, Peace Lily Plant, Peace Lilies, Spathiphyllum, Indoor Plants, Houseplants

Reset Plan: From Yellow to Lush in 9 Steps

  1. Prune yellow leaves

    Prune at the base to redirect energy.

  2. Check drainage

    Pot must have holes; empty saucers after watering.

  3. Refresh the mix if it’s compacted

    Use an airy blend with perlite/bark.

  4. Right-size watering

    Water when the top inch is dry; soak thoroughly; don’t leave standing water.

  5. Switch water quality

    If your tap is hard/fluoridated, try filtered, distilled, or rainwater and flush quarterly.

  6. Stabilize temperature & humidity

    Keep 65–80°F (18–27°C); move away from vents/doors; use a pebble tray or humidifier in dry rooms.

  7. Repot if rootbound

    Choose a container 1–2 inches wider; refresh with a well-draining mix.

  8. Upgrade the light

    Move to bright, indirect light—closer to a window with a sheer curtain.

  9. Feed lightly

    In spring/summer, fertilize every 4–6 weeks at half strength; skip winter.

Plants are sometimes touted for “air cleaning,” based on lab studies in sealed chambers. In real homes, ventilation matters far more. Treat your plant as a beautiful mood booster (see context on air-purifying plants)—and focus your peace lily care on light, water, temperature, humidity, and roots.

Light & Water Matrix (to Prevent Future Yellowing)

Light Level Expected Growth/Blooms Typical Watering Range* Yellowing Risk
Low (far from windows) Leafy, few spathes Every 7–12 days Due to dim light & overwatering
Medium indirect Steady foliage, occasional blooms Every 5–9 days Balanced—sweet spot
Bright indirect (near sheer curtain) Best blooms Every 4–7 days Watch for dryness & salts

*Ranges vary by pot size, mix, humidity, and season. Always confirm by feeling the top inch of soil.

Soil Mix & Repotting Signals

Why this section matters: the potting medium controls how water, air, and nutrients move around your peace lily plant. A heavy or exhausted mix holds water too long—this mimics 2 Overwatering and often triggers 3 Root rot. Compaction reduces air spaces, causing 5 Poor drainage/compaction. Salts from tap water or fertilizer build up faster in tired mixes, leading to 9 Fertilizer/salt issues. And when pH drifts or the mix breaks down, key elements (iron, magnesium) become unavailable, causing 10 Nutrient lockout – classic yellowing with green veins. Getting the mix right and repotting on time prevents a huge share of yellow-leaf problems, which is why the quick recipe and repot cues below are so helpful for everyday peace lily care.

Well-Draining Houseplant Mix

  • 2 parts all-purpose houseplant mix
  • 1 part fine bark (orchid or composted)
  • 1 part perlite or pumice
  • Optional: a touch of coco coir for moisture balance

Tip: If your water is hard/chlorinated and you see yellowing with brown tips, try filtered, distilled, or rainwater.

Time to Repot When…

  • Roots circle the pot or poke from drainage holes
  • Water races through or the plant wilts quickly after watering
  • Soil compacts and dries unevenly
  • Growth slows despite good light and feeding

Peace Lily Care Calendar (Prevents Most Yellowing)

Month-by-Month Reminders
Months Tasks
Jan–Feb Growth slows. Water less often (but don’t let the root ball fully dry). No fertilizer. Keep near bright, indirect light; avoid drafts.
Mar–Apr Resume feeding every 4–6 weeks at half strength; repot/divide if root-bound.
May–Jun Peak growth. Keep soil evenly moist; rotate the pot every 1–2 weeks for even light.
Jul–Aug Boost humidity if AC runs; watch for mineral buildup; flush the pot if needed.
Sep–Oct Move closer to windows as days shorten; reduce feeding to every 6–8 weeks.
Nov–Dec Rest phase. Hold fertilizer; keep evenly moist; avoid drafts and direct heat.

When Yellow Isn’t a Red Flag

A single yellow leaf every month or two is part of normal turnover. Remove it, scan your routine, and carry on. But if several leaves yellow at once—or new growth is pale—work through the 15 causes above, starting with moisture, light, temperature, and humidity. Small tweaks to peace lily care make a big, visible difference.

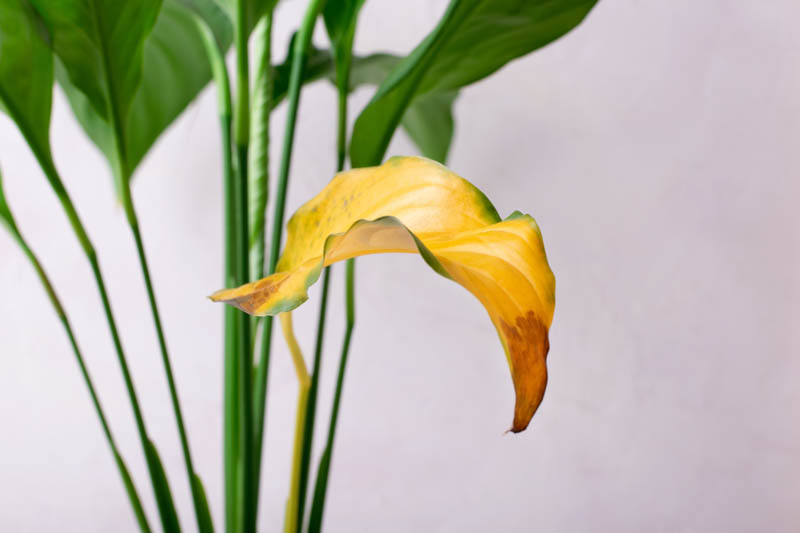
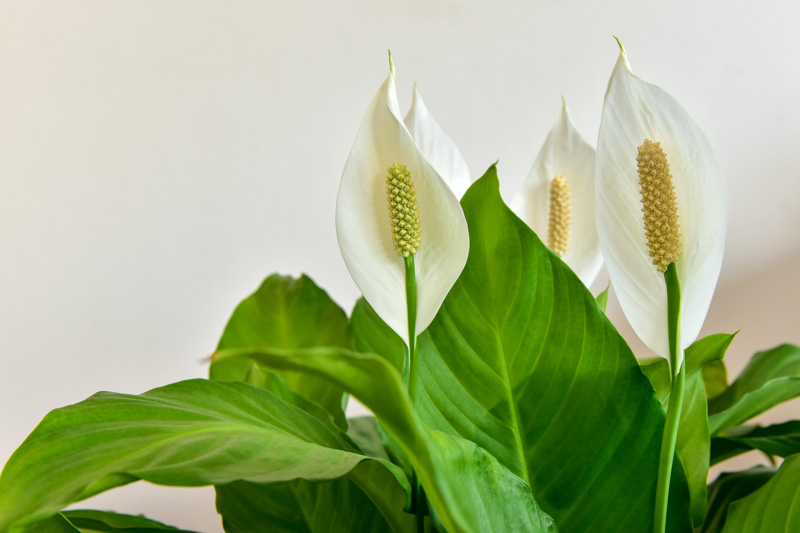
Also normal: after flowering, white spathes naturally yellow and brown as they age—trim spent stalks at the base.

Frequently Asked Questions

Why do peace lily leaves turn yellow after I move the plant?

That’s transplant or location shock—light, humidity, and watering change all at once. Trim the worst leaves, stabilize conditions, and new growth should emerge within weeks.

Can cold or drafts cause yellowing?

Yes. Temperatures below ~60°F (15°C) or blasts from AC/heaters can stress foliage into yellowing and browning. Aim for 65–80°F (18–27°C) and steady humidity.

Will yellow leaves turn green again?

No. Once a leaf has yellowed, it won’t re-green. Focus on preventing new yellowing and prune the old leaf at the base.

Bottom Line

Yellow leaves are your plant’s nudge to fine-tune the basics: brighter indirect light, even moisture in a well-draining mix, steady 65–80°F, moderate humidity, gentle feeding in active months, and better water quality if your tap is hard. With a few adjustments to daily peace lily care, your peace lily plant will bounce back to glossy, deep green—no drama required.

Guide Information

Hardiness 11 - 12
Plant Type Houseplants, Perennials
Plant Family Araceae
Common names Peace Lily
Exposure Partial Sun
Season of Interest Spring (Early, Mid, Late), Summer (Early, Mid, Late), Fall, Winter
Height 1' - 4' (30cm - 120cm)
Spread 1' - 4' (30cm - 120cm)
Maintenance Low
Water Needs Average
Soil Type Clay, Loam, Sand
Soil pH Acid, Alkaline, Neutral
Soil Drainage Moist but Well-Drained
Characteristics Showy, Evergreen

Recommended Guides

Are Peace Lilies Toxic to Dogs? Safety & Care Tips
Are Peace Lilies Toxic to Cats? Safety & Care Tips
Best Indoor Plants for Cleaner Air
Pothos vs. Philodendron: Which Houseplant Is Right for You?
How to Grow and Care for Pineapple Indoors
Overwinter Peppers Indoors: A Step-by-Step Guide
How to Grow Citrus Indoors: From Fragrant Blooms to Homegrown Fruit
Grow These 20 Herbs Indoors for Freshness All Year
How to Grow and Care for Indoor Palm Trees
Indoor Succulent Plants: Best Varieties for Your Home
Indoor Lavender Care: Your Guide to Growing Beautiful Plants
Indoor Vining Plants: The Secret to a Lush Home Interior
While every effort has been made to describe these plants accurately, please keep in mind that height, bloom time, and color may differ in various climates. The description of these plants has been written based on numerous outside resources.

Guide Information

Hardiness 11 - 12
Plant Type Houseplants, Perennials
Plant Family Araceae
Common names Peace Lily
Exposure Partial Sun
Season of Interest Spring (Early, Mid, Late), Summer (Early, Mid, Late), Fall, Winter
Height 1' - 4' (30cm - 120cm)
Spread 1' - 4' (30cm - 120cm)
Maintenance Low
Water Needs Average
Soil Type Clay, Loam, Sand
Soil pH Acid, Alkaline, Neutral
Soil Drainage Moist but Well-Drained
Characteristics Showy, Evergreen

Related Items

Please Login to Proceed

You Have Reached The Free Limit, Please Subscribe to Proceed

Subscribe to Gardenia

To create additional collections, you must be a paid member of Gardenia
  • Add as many plants as you wish
  • Create and save up to 25 garden collections
Become a Member

Plant Added Successfully

Your garden is taking shape. Unlock full planning.

You’ve reached the free limit. Upgrade for $25/year to add as many plants as you wish and save up to 25 garden collections. Unlock Annual Membership

Update Your Credit
Card Information

Cancel

Create a New Collection

Sign Up to Our Newsletter

    You have been subscribed successfully

    Join Gardenia.net

    Create a membership account to save your garden designs and to view them on any device.

    Becoming a contributing member of Gardenia is easy and can be done in just a few minutes. If you provide us with your name, email address and the payment of a modest $25 annual membership fee, you will become a full member, enabling you to design and save up to 25 of your garden design ideas.

    Join now and start creating your dream garden!

    Find your Hardiness Zone

    Find your Heat Zone

    Find your Climate Zone